Thursday, December 27, 2012

Nac Mac Feegle's Figurative Fire Stopper


It's finished, and no longer a secret, so I can post about it now. I made this for a friend who said she's always "putting out fires" at work. I am quite pleased with myself; this is the first arumigumi/toy type thing I've ever made, let alone designed. I'm glad I used wool, because blocking was pretty important to make all the bits look the way they are supposed to look. If using acrylic, I recommend dipping the parts other than the canister in a very thin solution of either Elmer's glue and water or laundry starch, so they can be shaped.

Gauge = 12 stitches/inch in stockinette
I used Brown Sheep Sport on U.S. 0 (2mm) needles

Yarn: Sport/Fingering weight
Red: about  25 yards 
Light Grey: About 1 yard
Black or Dark Grey: About 1 yard

(I used Brown Sheep Naturespun Sport for the canister, Regia 4 ply Solids for the other bits, because that's what I happened to have on hand.) Embroidery floss would work well for the bits, too.)

Size: 3" high and 1" in diameter (Edit: I don't know how I originally managed to say this thing was 4" high. Sorry about that.)

With main color (red), using the magic circle cast on, cast on 6 stitches
Round 1: Knit
Round 2: kfb 6 times (12 stitches total)
Round 3: kfb, k1, repeat around (18 stitches total)
Round 4: kfb, k2, repeat around (24 stitches total)
Round 5: kfb, k3, repeat around (28 stitches total)*
Round 6: purl
Round 7: k5, s1, psso, four times (24 stitches total)**
Rounds 8- 30: knit

Stop knitting and stuff; evenly and fairly tightly, because poking stuffing down a very small hole after the following decreases is pure drudgery

Beginning with round 31:
Decrease 4 stitches every other round, until four stitches are left on the needle
Fasten off  by cutting the yarn, pulling it (loosely!) through the remaining stitches, and knotting
Tuck the yarn end down into the body of the work. Cram in some more stuffing to fill the newly created space

Handle: cast on 4 stitches. Work 8 rounds of i-cord
Rounds 9 & 11: Knit
Rounds 10 & 12: Purl
Work 8 more rounds of i-cord
Fasten off: cut yarn, pull end through the stitches

Hose:
Part 1: (Crochet)  With lighter grey, chain 20 stitches, or desired length
Part 2: (Knit) Insert needle into 3rd chain from the end. Cast on 3 stitches
Work seven rounds of i-cord around the end of the crocheted chain
Increase by one stitch on rounds 3, 5, and 7 (final row of i-cord will have 6 stitches)
Fasten off: cut yarn, pull loosely through all stitches, leaving a tail of about  6" yarn for assembling

Mount: (Crochet)
Chain 20 (or as many stitches needed to fit loosely around the canister) join to form ring
Round 1: Chain 2 (forms first stitch) hdc in each stitch around, slip stitch to close ring
Round 2: Chain 3, slip stitch in first chain from hook to form a small picot
Fasten off: Cut yarn, pull through final stitch

Assembling and Finishing:
1: Attach small end of hose to handle by pulling "tail" of yarn between the stitches at the center of the handle, knot
2: Fold the handle in half (centering on the flat area between the two i-cord portions. Attach to canister by placing on one side of the "neck. Pull the "tail of yarn from the "hose" to the outside of the center, weave it through the stitches at the base of the neck. Lash it around the handle (like sewing on a button with a post; I don't know how else to describe it) three times, between three of the four stitches at the top of the canister
3. Slide the mount over the cylinder and the hose, to desired position. (It should sit about 1/3 of the way down the canister.) Position the picot over the hose. Tack in place if desired
4. Weave in and trim ends
5. Block and shape, stiffen with glue or starch if desired
6. Give to friend
7. Enjoy the squee

*originally read "kfb, k2," which is incorrect
**the decreases are a refinement I thought of after I created this thing, to keep the cylinder more--cylindrical

Wednesday, September 26, 2012

Shh! It's a Secret!

I'm working on creating a little bit of amigurumi for a new--but already--close friend. Don't tell. It's geeky and kind of punnish, and I think it's hilarious.

Hints: It will be tiny, and mostly red. The main part will be knitted in the round, gauge is 12 stitches to the inch. Ravelry doesn't have any (though they have everything else) so I have to design my own.

I should have updated a while back, but life DOES get in the way. The project is made, gifted and a big hit. The person I made it for was grumbling that she keeps having to put out fires that other people make. We joked about her needing a teeny tiny fire extinguisher to keep on her desk. Since I had no idea where to find such a thing, no money to buy one if I did, AND I knit--

I present to you the nac mac Feegle Figurative Fire Stopper. (Not to be used in the event of an actual, non-figurative fire.)


Techniques used: Knitting: slip-ring cast on, knit, purl, increasing, knitting in the round, decreasing, i-cord. Crochet: chain, hdc.

Recipe for making your own in a future post.

Method To My Madness

Mostly Unrelated Picture. Just for Fun.

I knit weird. When I first learned to knit, back in the dark ages when we had to hunt and skin our own acrylics and polyesters---using flint tipped needles--chasing them down the dark and fetid aisles of the local general store, I was taught by my great Aunt Fern. She was an amazing teacher, and I was a pretty good student back then. I didn't realize that the "method" she taught me was "all wrong," at least according to some people, for whom rules are more important than either product or process. I've taught a lot of other people to knit weird, too.

Many years later--after Ravelry, and a proliferation of LYS brought civilization to us savages--I discovered that I could get my hands on other fibers to knit, and that patterns for complex designs involving textures and shaping require some changes in method. The end results look just like something made with the more"standard" versions, so any one who doesn't like my methods can go chew on a big ol' hank of wormy chenille, and stay the heck out of my way. I'll be over here, knitting for people who appreciate it, and having a lovely time.

I still think "my way" is easier all around than any other, and as much as I enjoy wrapping yarn around sticks and pulling it off again, I like to actually make stuff that can be used in some way or another. (You! In the back. Stop sniggering, unless you're thinking about cheezombie's slugs, which are very cool.) Put most simply, I knit in the backs of my stitches. I purl in the front of them; so the motions to make a purl stitch are the exact mirror of the ones for the knit. (That's WHY I knit in the back; if the next row needs to be purled, it sets the stitch up correctly.) That's all. Sometimes I knit from right to left instead of left to right too, but (I think) that's not all that odd.

The first cast-on I learned was the backward loop (wait! There's more than one?) Then I discovered knit, followed by cable (what? they're not the same thing?) cast ons, and used those for a very long time. Even more years later, I learned long tail and Judi's Magic, and crochet, and provisional, all of which cover pretty much everything I've wanted to knit so far, though I'm sure there are others out there.

Years later, I taught myself a whole bunch of other techniques for laces and insertions, short row shaping and steeking, edgings and colorwork and all that complicated stuff, plus how to read patterns and "convert" stitches to "my" style as necessary. From there, it was logical leap to begin writing my own patterns, and I'll probably start charting them soon. I can read charts, but I'm not very good at it. It's still a "foreign" language that I haven't learned to think in, yet.

I like making stuff up, even when the math is hard.

Tuesday, July 24, 2012

Socks of Doom

Pattern: Jane's Hedgerow Socks
Yarn: Regia 4 Ply Fadig, colorway: Bark

Gauge: 28 stitches/40 rows = 4" in stockinette
Needles: U.S. 0 (you'll probably want to use 1s unless your knitting is loose and sloppy like mine) circular(s) or dpns
Techniques: Magic Loop, Toe Up Gusseted Heel, Jeni's Surprisingly Stretchy Bind-Off

My, What Lovely...Feet You Have!

I have made socks for three of my four sisters. I've been putting off making a pair for the remaining sister for several years. I want to make her socks. I tried to make her socks. I failed. When I originally asked her what she would like, she told me she wanted:

Plain.
Black.
Long Wearing.

*sigh*

I love my sister. I want to make her happy. I want her to have socks that she really likes. I tried. Hard. I managed--in spite of the fact that I am half blind-- so black yarn is virtually impossible for me to knit with, and have ADHD--so endless swathes of tiny stockinette stitches make me really stabbity--to complete one sock. I did have to put a hot pink toe on it to keep from losing my mind completely, but I got it done.

It languished in the craft pile for several years. I had cataract surgery, and got new glasses. I discovered cuboid needles, which help me make my usually straggly stitches a lot more evenly sized. I got medication for the ADHD, so can now focus on repetitious stuff for long periods of time. But I can't make myself knit that second sock, I still don't hate myself enough to endure the drudgery that it entails. I threw out the one I'd made so it would stop taunting me; I didn't even try to salvage the yarn.

The other knitted gifts I've been making keep giving me a vague sense of nagging guilt. I finally decided that I do very much want to make this sister a pair of socks, but I have to honor myself as a crafter, first. I hunted Ravelry for a pattern that would be reasonably plain, and my stash for a dark neutral nylon reinforced wool fingering weight yarn.

I switched the pattern from top down to toe up, and my gauge is 7 (rather than 8) stitches to the inch on U.S. 0 needles. I wanted a rounder toe than the standard one that increases by four stitches every other row, and that took some research and a lot of experimentation before I got a result I like. Bonus (which may have subconsciously led me to picking this pattern) the sister's name is Jane.


It really is a foot. It's not a strange pink tree root. I promise.

Patterm Adaptations:
Rounded Toe: 
Judy's Magic Cast On: 10 stitches each needle. (20 stitches)
Round 1: knit
Rounds 2-5: k1, inc1, knit, inc1 in second stitch from end of needle, repeat on second needle (36 stitches in round 5)
Round 6, 8, and 10: knit
Rounds 7, 9, and 11: k1, inc1, knit, inc1 in second stitch from end of needle, repeat on second needle (48 stitches)
Rounds 12, 13, 15, 16, 18, 19, and 20: knit
Rounds 14, and 17: k1, inc1, knit, inc1 in second stitch from end of needle, repeat on second needle (56 stitches)

The trick to making a rounded toe with paired increases on top and bottom is to divide the rounds into 3 or 4 segments (depending on how many stitches are desired for the foot) and knitting first none, then 1, then two, then 3 (for more 60 stitches) even rounds in between the increase rounds. Once the desired total of stitches is reached, end with one or more even rounds before starting the pattern repeats.

Work top of sock in pattern, and bottom of sock in stockinette until it measures 65% of desired finished length. (I want my finished sock to be about 10.25" long, so fudging the math just a bit:

10.25 inches = 102.5 rounds x 65% - the 20 for the toe = 48

The pattern stitch for this sock is very simple:

Round 1: k1, p1, k2, p2, repeat to end of round
Round 2: k2, p1, k2, P2, repeat to end of round

So I've got four more rows to knit before I start the heel, which is going to be the Toe Up Gusseted Heel from Maia Spins.

I'll edit this post and add more pictures when I get to that part.


Monday, July 9, 2012

Second Verse


Update 7/09/12: And now they are done. I like the way the turned out more better this time. And they fit. Perfectly.


Not quite the same as the first, but "Do Over" is such a depressing name for a project.  Halfway through the second sock, I (a) didn't really like the pattern and (b) realized they were going to be too bloody big. 


Cascade Fixation stretches. A LOT. So I frogged and started over. (Yes, that IS why I am called Rana Catesbeiana, at least in part. I generally frog everything at least once.)

The pattern I'm using instead is Hermione's Everyday Socks by Erica Lueder. More or less.

Gauge is 24 stitches/36 rows = 4” on U.S. 2 needles.

Cast on = 48 stitches
Cuff = 18 rows; k3, p1 rib
Leg = 40 rows;  in pattern
Heel = 18 rows; eye of partridge, with slip stitch, p1 edges
Gusset = pick up 10 stitches on each side
Foot = 36 rows (plus gusset decreases, so 58 in all)
Toe = 24 rows (decreasing to 16 stitches)

The four stitch, four row pattern breaks up the pooling of the clown barf quite nicely. I’m using a k3, p1 rib for the cuff, a heel flap, paired decreases for the toe, grafting to bind off.

If you want help figuring out the number of stitches/rows for various parts in a different yarn/size/gauge, leave a comment and let me know.


I'll keep the notes and pics from the first verse for the record, but the sock and a half are no more. They are expired. They are ex-socks.

*  *  *  *  *

Version One, nicknamed 5 x 5, circa 4/20/12

When the character Faith from the television series Buffy the Vampire Slayer is asked how she is, she answers, "five by five." It comes from old radio slang, and pretty much means, "all is well." I don't know if that actually describes these socks (well, it didn't actually describe Faith either) but the pattern repeat is five stitches by five rows, and I like it.

And it's clown barf! which is always well.


I had a couple of criteria in mind when designing these socks. Two yarns, one plain and one not so plain had to play nice together. Cascade fixation is a bit of a challenge for a sock, because it's fairly substantial, and rather textured at the same time. I ganked the cuff pattern from Columbia by Catherine Gamroth. I didn't think the abrupt change from the pattern to stockinette would work with my two sibling yarns, so I kept a repeat of it winding down the heel, while smoothing a variation into the foot.

I had planned to make the toe in lime green also, but that yarn was in another room and the Atlanta Braves were winning. I didn't want to stop knitting or watching, either one. I may put a green toe on the second sock, we shall see.


All is well, and all is well, and all manner of things will be well.

I'm using roughly 90 grams of Cascade Fixation or  similar DK/8 ply yarn, and U.S. size 4 (3.5 mm) needles. One at a time, magic loop.

Gauge = 5.5 stitches/8 rows to the inch, more or less.

Pattern and more pics to follow.

(Edit to update: or not. If I try again with different yarn, I'll write a new post.)


Thursday, June 21, 2012

Bagginses

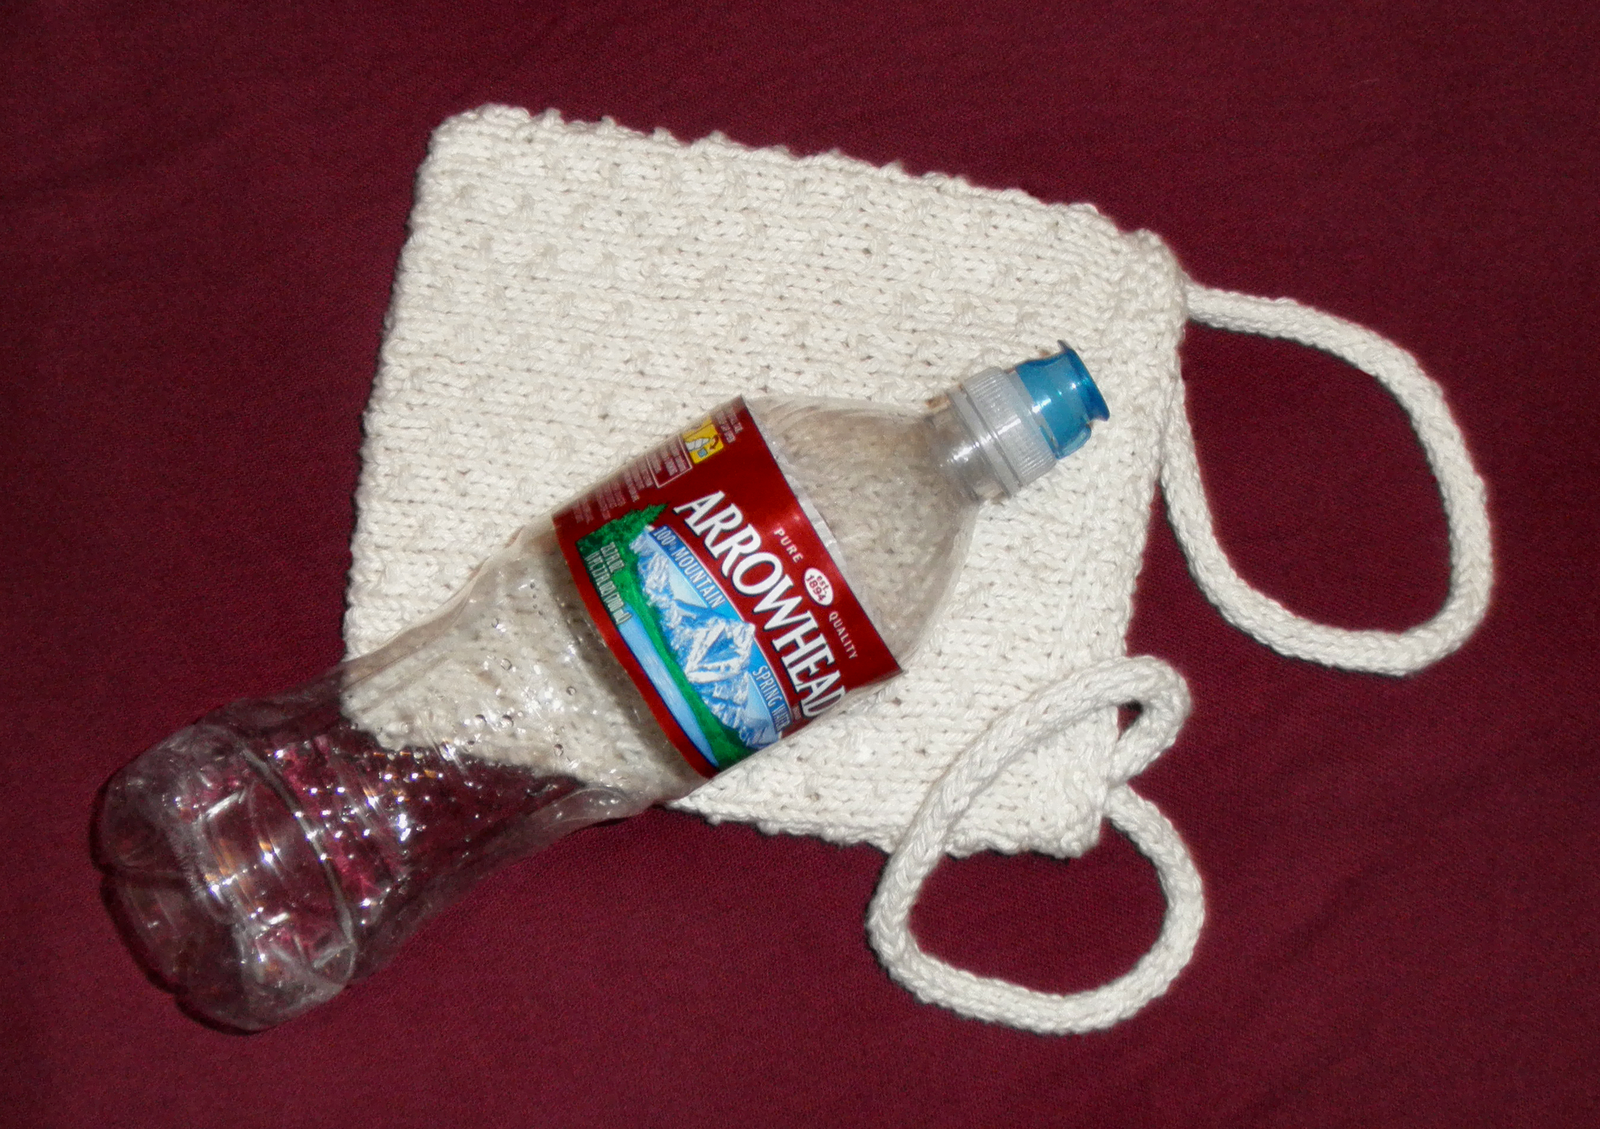
This is a prototype, made by request for a friend. She actually needed a whiter yarn,and a bigger, taller bag. The version pictured here is 6" wide by 9" tall. It's a good size to hold a Kindle or a paperback book, a small knitting project, and/or sundry other accouterments.

Hers is 8" wide by 12" tall; you could stuff a whole bunch of thingies in there. I'll leave the what to your imagination. I didn't get pictures of the one I made for her, but it's this one's big brother, pretty much. And white.
Gauge:  18 stitches/20 rows = 4 inches

Needles: U.S. 6 or size needed for gauge

Yarn: kitchen cotton, linen, blend, or other worsted weight yarn that doesn't stretch. (I used Peaches and Creme Ecru, I'm guessing about 40 yards or summat, probably a little less.


Stitch Pattern One  (probably has a name but I don't know it.)
Row 1: p1, k3, repeat
Row 2: purl all stitches
Row 3: k1, p1, k2, repeat
Row 4: purl all stitches

Stitch Pattern Two  (Half Linen Stitch)
Row 2:  k1, slip 1, repeat
Row 2: purl all stitches

The stitch patterns above are for knitting flat. When knitting in the round, reverse all even numbered rows.

Cast on 56 stitches

I like Judy's Magic Cast On. If you'd rather seam the bottom, be my guest. Use your favorite cast on, and join to work in the round. If you'd rather work flat and don't know how to change the pattern to do so, leave me a comment; I'll 'splain. If you want to make a different size, and don't know how to do the math, tell me where you're lost, and I will happily show you, but I'll leave you to figure it out. Deal? Deal.

Round 1: p1, k3, repeat around.
Round 2: knit
Round 3: k1, p1, k2, repeat around.
Round 4: knit
Repeat these four rounds 12 times (48 rounds total) or until bag measures 7.5" deep
Knit next four rounds
Rounds 53, 55, and 57: k1, slip 1, repeat around
Round 54, 56, and 58: knit
Round 59: purl
Round 60: purl

Bind off.

Straps (make 2):
Cast on 4 stitches. Knit as i-cord until desired length is reached. (I did 60 repeats.)

The person in the demo I've linked says "you must use a double pointed needle." Actually, you don't must. I usually use a circular needle because--like an idiot--I gave away all my dps when I moved, but you can make it with single points if necessary. Just slide the stitches to a second needle without knitting them, and start knitting on the one that is now in front. When you've knitted all of them, lather, rinse, repeat until your i-cord is the desired length, or until you will have to rip out your hair or poke out your own eyes with your needle(s) if you try to make One.More.Stitch. If you can cajole or bribe someone to make it for you, so much the better.

Attach the straps securely two rows down and four stitches in from the top and sides. Weave in the ends and call it done. Let me know if you have any problems with the pattern. Other problems? Get a shrink.


This pattern is for personal use only. Feel free to share it with others, but it may not be sold.


Wednesday, June 13, 2012

+2 to Charisma

I made this to use as a dice bag, but it would be excellent for gifts, a cell phone cozy, a belt pouch, or something like that. Because it's technically lace (meaning; it has holes) stuffing it with things small enough to fall out (about 1/4" in diameter) is probably not a good idea, unless you want a believable reason for "losing" said things.


It's worked from the bottom up, in the round. I use a “toe up” cast on because I don't like seaming; otherwise cast on as you would normally do (long tail, knit, or cable cast on would all work just fine) and then seam the bottom as part of your finishing. This one is done with a figure eight, because I hadn't yet discovered Judi's Magic Cast On. The results are very similar, I think Judi's is easier.


The lace design is the same as the Hourglass Eyelet from the 365 Knitting Stitches a Year calendar, but the bag itself is my own original design. Many thanks to Cyndi for test knitting and pointing out needed corrections. Feel free to use personally or share, but this pattern may not be sold or published for commercial use.

The finished piece is about 5” wide and 6” tall. I used about 30 grams of Peruvian sport weight merino wool from Elann, and U.S. 6 needles. Gauge is approximately 7 stitches to the inch in garter stitch. I've written the one set of decreases as “ssk” rather than “s1, k1, psso,” simply because it's easier to write, but I actually use the s1, k1, psso technique. Either one will work just fine.

Cast on 40 stitches and join, being careful not to twist. Mark beginning of round.
Round 1, 3, 5, and 7: knit
Round 2, 4, 6, and 8, purl
Round 9: p1, k6, p1, k5, p1, k6, p1, k6, p1, k5, p1, k6
Round 10: p2, k5, p1, k5, p1, k5, p3, k5, p1, k5, p1, k5, p1
Round 11: *p1, k1, yo, ssk, p, k2tog, yo, k1, yo, ssk, p1, k2tog, yo, k1, yo, ssk, p, k2tog, yo, k1, repeat from * to end
Round 12: p2, k2, p1, k5, p1, k5, p1, k2, p3, k2, p1, k5, p1, k5, p1, k2, p1 
Round 13: *p1, k3, p1, k5, p1, k5, p1, k3, repeat from * to end
Round 14: Repeat round 12

Round 15: *p1, k1, k2tog, yo, k1, yo, ssk, p1, k2tog, yo, k1, yo, ssk, p1, k2tog, yo, k1, yo, ssk, k1, repeat from * to end. 
Round 16: Repeat round 10
Rounds 17 through 25: repeat pattern from rounds 9 through 16.
Round 26: knit
Round 27: (eyelet row) *k2, yo, ssk, repeat from * to end
Round 28, 30, 32, and 34: knit
Round 29, 31, and 33, purl
Bind off


Finishing:
Seam bottom if you didn't use a "closed" cast on, weave in ends, and block. Thread an 18” i-cord, ribbon, or material of your choice through the row of eyelets for a drawstring. (I crocheted a 54” chain, then used that chain to crochet an 18” chain because making i-cord on circulars is a pain, and I'm lazy.)

Fill with dice, treasures, dreams, promises, silliness or whatever you like.